Table of Contents
Back to WiFiStation Documentation
WiFiStation: Installing WSLoader
WSLoader is the application loader, a small bootstrap program that is installed onto the MailStation by hand and is used to receive data from WiFiStation and execute it. It will be stored on the data flash of the MailStation in a certain location so that it appears in the Yahoo!/Extras menu.
Whenever WSLoader is run, it waits for input on the printer port from the WiFiStation and then loads whatever it receives into RAM and executes it. To permanently store programs instead, see the Flash Loader.
Note: These steps show the installation process on a MailStation DET1 with firmware version 2.54. Installing on other MailStation models will probably not work, though different firmware versions might.
1. Enter the Diagnostics Menu
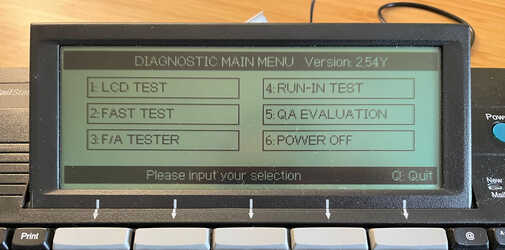
With the MailStation off, hold down Fn + Shift + T. With all three keys held down, press the Power button to turn the unit on and then let go of the keys once you see the Diagnostic Main Menu.
2. Enter the Hidden Hex Viewer/Editor
Press Shift and the right-most unlabeled button under the screen with an arrow pointing down to it (we'll call it F5). You should appear at the hex viewer.
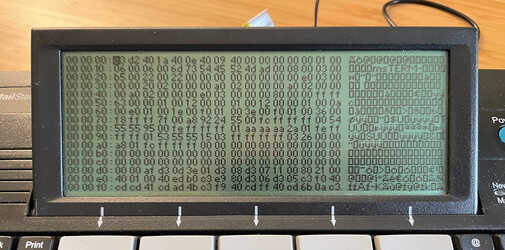
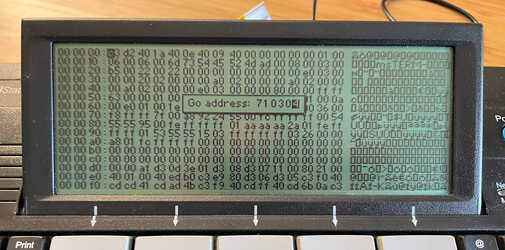
Press the G key and it will prompt for an address.
Enter 7 1 0 3 0 4 and then X (which will not appear). Press Enter. This unlocks the ability to enter a write/editing mode.
3. Modify Application Count and Locations
Press G again and when prompted, enter 0 2 0 0 0 0 and press Enter.
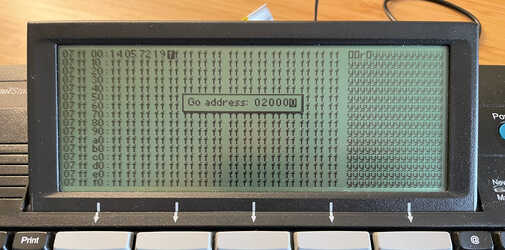
This page in flash memory determines how many applications are installed which will appear in the Yahoo!/Extras menu. We'll enable all 5 of them (the first byte), and set the start page of each to their standard addresses, even though there probably won't be 5 applications installed yet. This is just so you won't have to come back later and do this if you install more applications. By default, the data locations for each of these applications will be zeroed out or they will have one of the Yahoo! static image applications installed (like TV Guide, Weather, etc.)
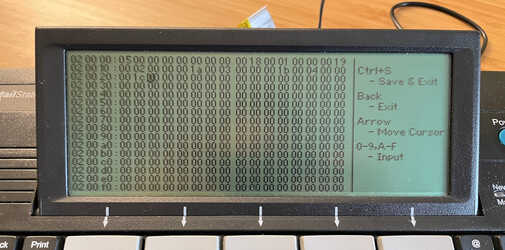
Press the S key to switch to edit mode (the right side of the screen will change). Enter the following bytes:
05 00 00 00 00 00 00 00  00 18 00 01 00 00 00 19
00 02 00 00 00 1a 00 03  00 00 00 1b 00 04 00 00
00 1c
When you're done, press S again (not Ctrl+S as it says on screen) to save your changes.
Note that in the hex editor, Delete does not work, and you can only move with the arrow keys. If you make a mistake and don't know where you are, just press the Back key to abandon all changes.
4. Type in the WSLoader Binary
Now that you've enabled all five application slots, you're going to manually type in the 100 or so hexadecimal bytes of the WSLoader binary into the fifth slot.
It can be hard to read this off of this screen and type it in on the MailStation, so it may be helpful to have someone read the bytes to you as you type so you can keep your eyes on the MailStation to watch for typos. If you later get reboots or weird problems loading new programs, you may want to come back and double-check that each byte was typed in correctly here.
Press the
G key and enter
0
1
0
0
0
0,
then Enter.
You'll be storing the WSLoader program as the last of the five programs at this
address (the first being at 0x00000, second at 0x04000, third at 0x08000,
and fourth at 0x0c000).
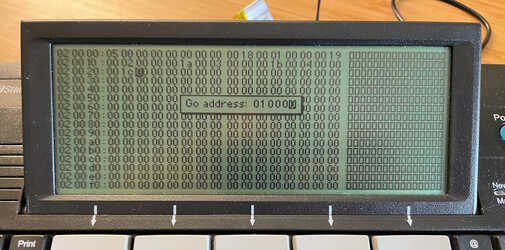
You may have a screenful of code here, or it may be all zeroes. In either case, it doesn't matter because you'll be typing over it. You don't need to zero out the bytes after the bytes you type in, but you can if you want.
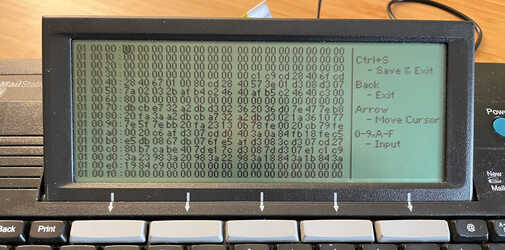
Press the S key to enter edit mode and then type in each byte below. Note that the first column of gray numbers are just the addresses that will match the screen and you will not type those in, I just included them to help you make sure you're on the right row. Good luck!
010000: c3 2a 40 1c 40 0e 40 09  40 00 00 00 00 00 01 00
010010: 08 00 06 00 57 53 4c 6f  61 64 65 72 00 00 08 00
010020: 00 00 0b 00 00 00 00 00  00 00 3e ff d3 0a af d3
010030: 09 3e 00 d3 2c cd 57 40  6f cd 57 40 67 3e 01 d3
010040: 08 d3 07 01 00 80 cd 57  40 02 03 2b af b4 20 f6
010050: af b5 20 f2 c3 00 80 e5  db 21 e6 80 28 fa e6 40
010060: 20 f6 3e 02 d3 09 db 21  e6 80 20 fa db 2d 6f af
010070: d3 09 7d e1 c9
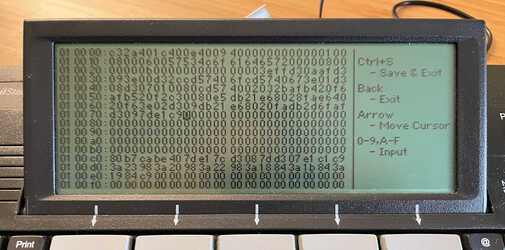
When you are done, press S again to save your changes and you should now see an ASCII version of the code on the right side of the screen. If you did it correctly, you should be able to read "WSLoader" in the second row.
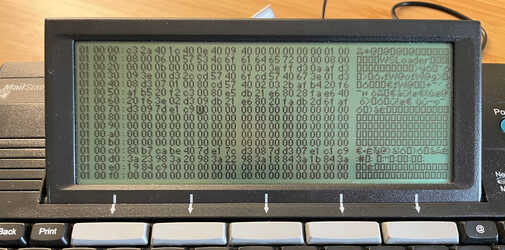
Note: to view the bytes for WSLoader if the code ever changes in the future,
you can use hexdump:
$ hexdump -C wsloader.bin
00000000  c3 2a 40 1c 40 0e 40 09  40 00 00 00 00 00 01 00  |.*@.@.@.@.......|
00000010  08 00 06 00 57 53 4c 6f  61 64 65 72 00 00 08 00  |....WSLoader....|
[...]
5. Reboot
You can now press the Back button and you'll be returned to the Diagnostic Main Menu. Press Q to quit. The MailStation will reboot, and you will probably see a menu like this:
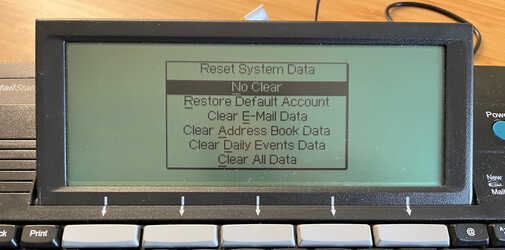
This is normal, just press Enter to not clear anything.
At the main menu, arrow over to Yahoo! and press Enter. If your version of firmware does not have a Yahoo! menu, enter the Extras menu and arrow over past the first screen of icons.
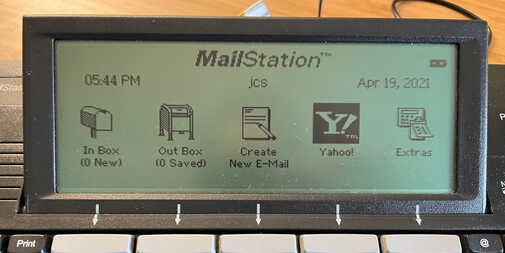
If all went correctly, you will see probably nothing for the first four application slots and then a WSLoader application with no icon. If your MailStation already had some applications installed on it, you will see them in the first four slots. In this example, the first application is my msTERM, then two blank slots, then a Michigan Lotto application that was installed from the previous owner, and then our new WSLoader.
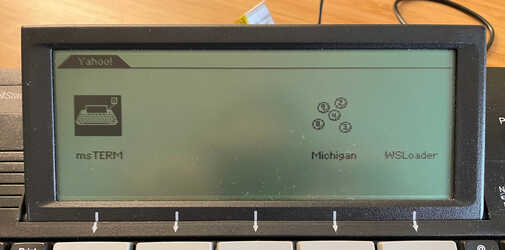
You can arrow over to WSLoader and press Enter, and then nothing should happen, though if you keep pressing the arrow keys they should no longer respond. This is normal, and WSLoader is waiting for input. If the MailStation rebooted instead, you probably made an error keying in the program and you should go back and verify it.
At this point, the MailStation won't respond to the keyboard nor the Power button, so you'll need to either upload a program through HTTP via WiFi or a USB cable (or just press the Reset button on the back).